 novityinfo
The Best 3D Renderers and How to Start Using Redshift
Advertisement
Rendering is the final step that brings all the hard work of modeling, texturing, and animating into a single, polished frame. Whether you’re working in architecture, animation, product design, or visual effects, the renderer you choose will determine how your work is seen. Each has its own strengths, workflows, and output style. Let’s walk through some of the most talked-about renderers today, one by one.
What Are the Best Renderers?
1. V-Ray
V-Ray has long been a favorite among professionals in architectural visualization and design. It integrates with software like 3ds Max, SketchUp, and Rhino, giving users flexibility across different platforms. What sets it apart is how it handles realism—lighting, shading, and materials all look natural. The customization it offers is deep, so users who like to fine-tune every aspect of their render can get a lot out of it.
2. Arnold

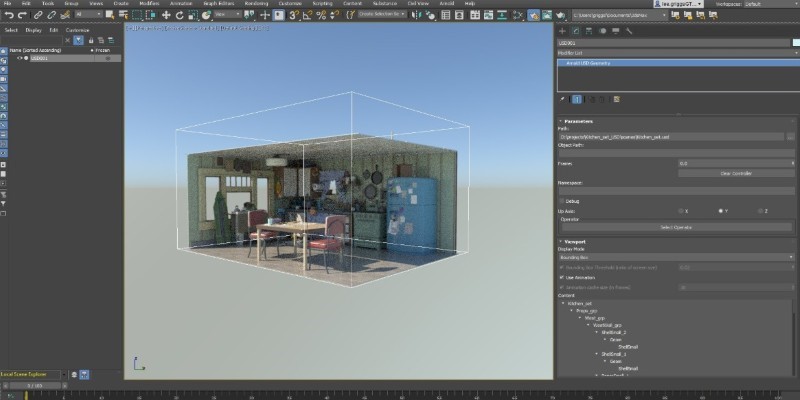
Arnold is known for its physically accurate results and clean output, which is why it’s used heavily in high-end film and animation production. Its interface is clean and easy to work with, especially within Maya and 3ds Max. It’s CPU-based, which appeals to artists who prioritize stability over render speed. It doesn’t flood you with sliders and toggles—everything is streamlined, and it behaves predictably, which can save time.
3. Redshift
For those who want both speed and control, Redshift steps in. It’s a GPU-accelerated renderer that caters to motion graphics and 3D animation. Redshift supports all the usual suspects—Cinema 4D, Maya, Houdini—and handles complex scenes without bogging down performance. It's designed for users who don’t want to wait around yet still want that photorealistic finish.
4. Octane Render
Octane stands out for its real-time rendering features and physically-based rendering system. It uses GPU rendering, too, and its node-based material editor gives users a visual way to build complex shaders. If you like getting visual feedback while you tweak your scene, this one fits the bill. It's also one of the few renderers that supports spectral rendering, meaning it simulates how light actually behaves across the spectrum.
5. Blender’s Cycles
Cycles is Blender’s path-tracing engine, and it comes built-in, so there’s no need to spend extra. It produces high-quality renders and supports both CPU and GPU, which is great for flexibility. The integration with Blender’s UI means there's no jumping between apps or plugins. And while it may not render as fast as some GPU-only engines, the results speak for themselves in stills and animations.
6. Corona Renderer
Corona strikes a balance between simplicity and realism. It’s CPU-based and mostly used within 3ds Max. What makes it stand out is the minimal setup it requires—lighting and materials behave as expected without too much tweaking. It’s great for artists who want a stress-free setup and natural-looking output, especially in interior and exterior visualizations.
7. Lumion

Lumion is different in that it's built for real-time rendering and is targeted toward architects. It doesn’t just create beautiful images; it helps users show full environments with ease. Features like real-time weather, vegetation, and water make it possible to present a building as part of its natural setting. It’s fast, intuitive, and doesn't need a background in 3D art to get solid results.
8. Unreal Engine (with Lumen)
Unreal Engine wasn’t originally made for rendering stills or short clips, but its real-time rendering capabilities have made it a valid choice for architectural walkthroughs and product demos. With Lumen, its global illumination system, lighting behaves naturally in real-time. It’s more than just a game engine—it’s a visual sandbox that can produce impressive results on the fly.
9. KeyShot
KeyShot is often used in product design and marketing visuals. Its drag-and-drop interface means you don’t need a lot of 3D knowledge to create polished images. It supports real-time rendering and doesn’t require extensive setup—materials, lighting, and cameras are easy to manage. For designers who want speed without diving deep into technical settings, this one makes a lot of sense.
How to Use a Renderer?
Out of the options above, let’s go deeper with Redshift because it finds that middle ground between quality and speed. It's especially useful for artists who want great visuals without the long waits.
To begin, install Redshift and link it with your preferred 3D software—Cinema 4D is a popular choice here. Once you’ve opened your scene, make sure Redshift is selected as your active renderer. This is usually found in the render settings panel. It helps to adjust your output size and sampling settings early so you’re not surprised later by render times. Then, assign Redshift-specific materials to your objects. These can be accessed from the Redshift Material Manager or created manually through nodes. Keep your materials organized, especially if your scene is heavy.
Now, set up your lights. Redshift has its own lighting types—area lights, dome lights, and IES lights work particularly well. When you add a Redshift Dome Light, connect it to an HDRI image to create environmental lighting. Once that’s in place, test your scene using the Redshift Render View. It allows you to view live updates as you make changes, which helps a lot with material tweaks and camera placement. Before exporting, always check your AOVs (Arbitrary Output Variables) if you need separate passes like depth, specular, or shadows. These are found in the AOV Manager and can be added quickly for post-production work.
Final Thoughts
Choosing the right renderer depends on what you're working on and how you like to work. Some people want full control with physical accuracy; others want real-time feedback and speed. While each tool has its strengths, Redshift shows how GPU rendering can keep both performance and quality high without making you dig through endless settings. Once you've got your basics down, it's just a matter of experimenting and refining—rendering is where your 3D work finally comes to life.
Advertisement
Related Articles

Choosing Between Webflow and WordPress for Your Website in 2025
Instapaper vs. Pocket: Which Read-It-Later App Reigns Supreme in 2025

HubSpot vs. Mailchimp: Which Marketing Tool Will Benefit Your Business in 2025

Asana vs. Basecamp: Find the Best Fit for Your Projects in 2025

Pipedrive vs. HubSpot in 2025: A Complete Guide to Choosing Your CRM

Top Backup Solutions for Google Workspace You Can Rely On

ClickFunnels vs. ActiveCampaign: A Comprehensive Comparison for 2025

The 10 Most Reliable Open Source Platforms for Online Assessments

6 Audio Player Apps on Android That Don’t Waste Your Time

What's the Difference Between Bluesky and Threads: A 2025 Guide

FreshBooks vs. QuickBooks: Which is Best for Your Business in 2025